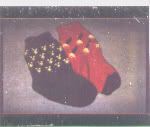
This pattern is not mine I am posting it in case the site ever goes down I can do this sweater later.
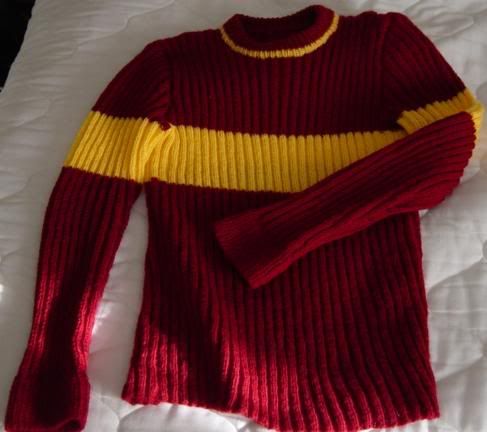
will fit ladies with a 38" (96.8 cm) bust.
Materials:
450g of double knitting yarn in MC:
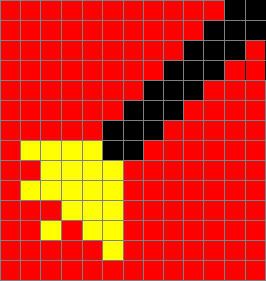
- Red for Gryffindor
- Yellow for Hufflepuff
- Blue for Ravenclaw
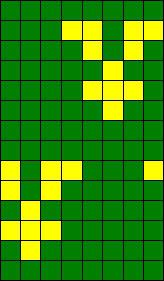
- Green for Slytherin
100g of double knitting yarn in CC:
- Gold for Gryffindor
- Black for Hufflepuff
- Bronze for book Ravenclaw
- Silver for movie Ravenclaw
- Silver for Slytherin
US7 (4.5 mm) needles
Note: The author tends to knit very tightly and mentionned others will probably need to use a size or two smaller needle than she did.
Gauge
22 sts per 4" (10 cm) by 30 rows per 4" (10 cm)
Instructions:
Front
Cast on 120 sts in MC. Work in K2P2 until the piece measures 14 1/2" (36.8 cm) from beginning.
Change to CC and work 4" (10.2 cm) even.
Armhole Shaping
Change back to CC and cast off 3 sts at the beg of the next 2 rows, then 2 sts at the beg of the following 2 rows.
Dec. 1 st each side every other row 5 times - 100 sts remain.
Work even until 23 1/2" (59.7 cm)from the beg.
Neck Shaping
Work first 44 sts; work next 12 sts and place on holder for neck; work rem 44 sts.
Working each side separately, cast off 4 sts at neck edge on next 2 rows. Cast off 2 sts at neck edge on following 2 rows.
Dec 1 st on neck edge every other row 7 times. Work even until 26 1/2" (67.3 cm) from the beg.
Shoulder Shaping
At armhole edge, cast off 11 sts on next 4 rows.
Cast off rem 9 sts.
Back
Work as for front, omitting neck shaping. Place rem 38 sts on a holder.
Sleeves
Cast on 62 sts in MC. Work k1, p1 rib for 3" (7.6 cm).
Continue in k2, p2 rib, inc 1 st on each side every 8 rows 15 times - 92 sts remain.
At the same time, when 15 1/2" (38.4 cm) from beg change to CC and work 4" (10.2 cm).
Top Shaping
Change to MC and cast off 3 sts at the beg of the next 2 rows, and 2 sts at the beg of following 4 rows. Dec 1 st at each side every other row 15 times. Cast off 2 sts at beg of next 8 rows then 3 sts at beg of next 4 rows. Cast off rem 20 sts.
Neck Band and Finishing
Sew right shoulder seam.
With CC and right side facing, pick up and knit 26 sts along left front neck edge, 12 sts from holder, 26 sts along right front neck edge, and 38 sts from back holder - 102 sts in total.
Work in k1, p1 rib for 4 rows. Change to main colour and continue for 20 rows. Cast off loosely.
Sew left shoulder seam. Fold neck band in half to the wrong side and sew.
Set in sleeves.
Sew underarm seams.